

Showing posts with label nail polish. Show all posts
Showing posts with label nail polish. Show all posts
5.22.2012
Nails done? OH YEAH! Check!
5.21.2012
Nail Polish: Color Club - Disco Nap
Today I would like to share with you another goodie I received from the lovely company Birchbox. Color Club's Disco Nap mini bottle was included within my box. I was super excited when I saw this, cause if you know me I am also a lover of polishes!
 Today I would like to share with you another goodie I received from the lovely company Birchbox. Color Club's Disco Nap
mini bottle was included within my box. I was super excited when I saw
this, cause if you know me I am also a lover of polishes! I am not really into mini nail polish bottles, but honestly I do not mind it at all.
Today I would like to share with you another goodie I received from the lovely company Birchbox. Color Club's Disco Nap
mini bottle was included within my box. I was super excited when I saw
this, cause if you know me I am also a lover of polishes! I am not really into mini nail polish bottles, but honestly I do not mind it at all.
Disco Nap is a part of their foil collection, and the only seller I have seen so far for it is from Birchbox for $8.
Disco Nap is a part of their foil collection, and the only seller I have seen so far for it is from Birchbox for $8.
5.08.2012
Tutorial: Nail Art - Sponge Gradient meets Splatter

Well I was asked to make a tutorial on this, and I know it is long over due! So sorry for that, but here it is and I hope you enjoy it!
5.01.2012
Nails done? OH YEAH! Check!
So my current nails are a mixture of two tutorials that I came across.

- My friend Emily had posted a link of Madeline Poole's perfect way to do gradient nails.
- I have been seeing saran wrap marble nails a lot lately. So I figured I would try it. I used Nailed It's tutorial upon it.

4.26.2012
Nails done? OH YEAH! Check!

Nail Polish Used:
- Orly Bonder for base coat
- Milani High Speed Fast Dry Nail Lacquer - Black Swift
- China Glaze - Secret Perwinkle
- Sinful Colors - Fig
- Milani High Speed Fast Dry Nail Lacquer - White on the Spot
- Milani Nail Lacquer - Orchidia
- Sinful Colors - Winterberry
- Sinful Colors - Island Coral
- China Glaze Fast Forward for top coat

4.17.2012
Nail Polish: Hedy's Ma.Nish.Ma. - Bolts of Blue


I saw this item over at Rite-Aid, right under a display of Wet N Wild nail polishes. The Hedy's Ma.nish.ma. display stated it was their matte line, so since I like matte polishes, I had to try it out for myself.
4.16.2012
Nail Polish: Milani High Speed Fast Dry Nail Lacquer


4.13.2012
Uh-oh! FiS moment!
Last night, we headed to Target, which was near a Rite-Aid I normally go to. We decided to swing by, and I was only suppose to grab one of Xan's favorite cookies (Moon pies), but I ended strolling around the cosmetic aisle. haha which I always end up doing! I decided to just grab three polishes.

The other day, hubs received a package in the mail from Milani Cosmetics. I totally forgot I entered him into the giveaway they were having on Facebook and Twitter. I guess he won their last one with the 25 sum random item winners.
 He gave me the items, so another intake to my collections. It was their new shades for this spring Runway Eye Shadows.
Yesterday I received the items I won from Crown Brush's giveaway they were doing on their Facebook fan page.
 I received Enkore's lovely makeup brush set he has with Crown Brush. I had bought this already last year, but HEY a girl can't have enough brushes haha. It's funny because I was just talking to my best friend, Les that I was thinking about buying some brushes. The Cosmetic Gods heard my prayers and granted me brushes YAY! I'll post up some sort of review or close look of these in due time.
Which of these items are you interested in seeing a review of?
Thank you for checking out my blog, and I hope you have a wonderful day!


- L.A. Girl Glitter Addict - Celebrate ($1.50 it was half off)
- Sinful Colors - Energetic Red ($1.99 typical price for them)
- Hedy's Ma.nish.ma. - Bolts of Blue ($2.99)
The other day, hubs received a package in the mail from Milani Cosmetics. I totally forgot I entered him into the giveaway they were having on Facebook and Twitter. I guess he won their last one with the 25 sum random item winners.
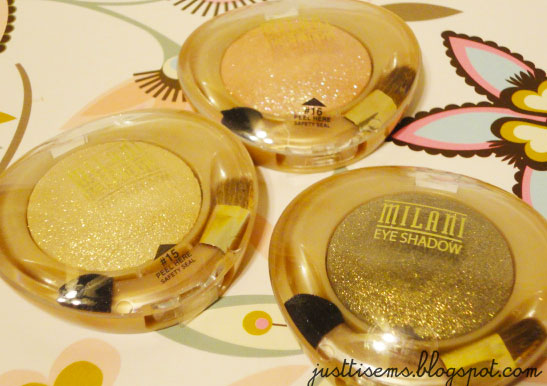
- Peaches & Cream
- Antigua
- Golden Touch
Yesterday I received the items I won from Crown Brush's giveaway they were doing on their Facebook fan page.

Which of these items are you interested in seeing a review of?
Thank you for checking out my blog, and I hope you have a wonderful day!
4.12.2012
Nails done? OH YEAH! Check!
Was suppose to post this earlier, but I was honestly having one of those moments where stress was kicking my ass. So here is what on my nails at the moment:
The roses were inspired by two wonderful girls:
 |
| Right Hand |
- CutePolish - She was one of the first YT nail art videos I started watching.
- Solmate - Megs is such a sweet girl, and good friend. When I saw her tutorial of roses, I knew I had to try them.
4.09.2012
Nail Polish: New York Color (NYC) Matte Me Crazy Top Coat polish
I needed a new matte polish, since my old one was turning to "ICK WTF is that?" So I mentioned to my nail girls that I am in search of a new one, and one of them has mentioned that NYC had came out with a matte polish.
 So my first pick of matte polish, was suddenly poofed whenever I went to Walmart -sad face-. Then someone on Twitter (Ciara) mentioned that they have snagged this little goodie up.
4.08.2012
Tutorial: Nail Art - Acid Grunge Wash

Once again these were a combination of inspirations from my dear sweet friend Emily, and Jamie from Nails Adored.
4.04.2012
Nails done? OH YEAH! Check!
So today's nails were inspired by a cake picture I saw on Tumblr. I loved the color on it! Black and turquoise. I decided I wanted to do my nails with vintage swirls vector of the sort.
 So here's what I came up with.
Nail Polish Used:
 I love getting inspiration from random things I see around. What inspired your recent nail work?
Hope you have a wonderful day, and happy polishing!

Nail Polish Used:
- Milani - Mint Candy
- Milani - Dark Coffee
Hope you have a wonderful day, and happy polishing!
Nail Polish: Milani Nail Lacquer - Mint Candy

4.02.2012
Uh-oh! FiS moment!

3.30.2012
Nail Polish: Milani One Coat Glitter - Twinkle, Lavender, & Pink Flare

3.28.2012
Nails done? OH YEAH! Check!!
So today's nails were inspired by Nails Adored, but I ended up doing something different with it. I decided to do the tie-dye trick I learned from my awesome friend Emily (A VERY creative nail artist <3).
 I layered polish colors using Nails Adored way, and allowed it to dry. I then took a cotton swab, and dipped it into a bowl I had poured some acetone in. From there I gently rubbed it upon the nail to lift some of the polish off. Simple, and very fun to do.
Nail Polish: New Milani Jewel FX - Fuchsia, Teal, Lavender, Hot Pink, & Red


- Lavender
- Red
- Fuchsia
- Teal
- Hot Pink
When I was looking at all the wonderful nail polishes I have received from them, I knew I had to bang out the Jewel FX polishes first. The glitters look so gorgeous swirling around inside that bottle. On their site, the polishes go for $4.99 each.
 |
| Milani Jewel FX - Fuchsia |
 |
| Milani Jewel FX - Red |
 |
| Milani Jewel FX - Lavender |
 |
| Milani Jewel FX - Hot Pink |
 |
| Milani Jewel FX - Teal |


- Fucshia - large and small particles of fucshia glitters
- Red - large red glitter
- Lavender - large and small particles of lavender glitters
- Hot Pink - large hot pink glitter with a mixture of silver holo graphics
- Teal - a mixture of chunky blue, teal, & silver holo glitter with small glitter particles

A great item to pick up if you're a chunky glitter lover! These will look killer with a matte top coat polish over it! You'll see me doing that in the future!
Thank you for stopping by, and I hope you have a wonder polisholic day <3

3.27.2012
Nail Polish: Sinful Colors Zeus and Pandora


Oh Milani you're too kind! What I won from their MVP.
I would like to thank Milani Cosmetics for doing this giveaway. If you haven't heard Milani has been giving out prizes all this month on the weekdays! It is open to US and Canada residents only. All you have to do is enter VIA their Facebook fan page or retweet one of their status updates upon Twiiter! One tweet, and one entry will have you entered into the entire duration of the giveaways. There is one giveaway all WEEKDAY! Winners from Twitter, as well as winners from Facebook. I believe this is only for the month of March. So get those entries in if you haven't done so yet!
 I won their Twitter contest on March 16, and was super excited! Seriously when you find out you won, you'll be screaming too. I was that excited!
 So of course when I received the notification, I screamed with joy. Hubs and kiddo were looking at me weird. They just don't understand haha!
3.25.2012
Nail Polish 101
Most people have the tendency to shake their nail polish bottles, right before they do their nails. This is a common mistake, since shaking the bottle will cause tiny bubbles as soon as it dries, which will cause your nail polish to chip faster.
Instead take the bottle between your hands, and roll it for about 25 to 30 seconds.
If you are not going to use the polish right away, and you find it separated (oil and color separation), then go ahead and give it a little shake!
Happy polishing doll!
Instead take the bottle between your hands, and roll it for about 25 to 30 seconds.
If you are not going to use the polish right away, and you find it separated (oil and color separation), then go ahead and give it a little shake!
Happy polishing doll!
Subscribe to:
Posts (Atom)